
Quality in, quality out. This is the ultimate guide on How To Prepare a Song For Mastering. Regardless of which recording program you used, these tips will ensure that the mastering process brings out the very best in your music.
How To Prepare a Song For Mastering
Contents:
- Ideal File Formats For Mastering
- Include Silence (& Exclude Fades)
- Monitor For Glitches / Pops
- Leave Headroom (+ What Is Headroom?)
- Avoid Limiting and/or Compression
- No Master Track EQ / Effects
- Always Use Separate Recording and Mastering Engineers
- Submit a Free Demo for Professional Mastering
Ideal File Formats For Mastering
We like to work with the audio standards – WAV and AIFF. 24 bit files are best, if possible.
Sample Rates – 44.1kHz VS 48kHz (VS 88.2kHz & 96kHz?)
There seems to be a lot of confusion regarding samples rates. 44.1kHz is kind of the standard, leftover from days of CD mastering.
To be honest, there’s not much difference going higher, other than waiting longer to bounce and upload your files. By the way, “bouncing” your file is when you mixdown all of your vocal / instrument tracks into one stereo file.
However, there’s an important thing to note when learning how to prepare a song for mastering. Resampling is better for us to do on our end. If your recording session used 48kHz, don’t resample it down to 44.1kHz.
Basically, if you recorded at 44.1kHz, prepare your song at 44.1kHz as well. Recorded at 48kHz? Send us a 48kHz premaster.
Include Silence, and Exclude Fades
We like to have room to work with. Leaving 2 or 3 seconds of silence at the beginning & end decreases the chances of accidentally cutting some audio. You also may end up chopping faint reverb tails abruptly. This can be hard to notice, and then it’s too late.
After that, we can move on to fades. It’s really best to leave fades to the mastering engineer. Our processing may do strange things to a fade you’ve already printed to the file.
Keep in mind, you are always welcome to send a reference clip with your preferred fade style and timing. As a matter of fact, we recommend it.
Listen (With Headphones) For Any Glitches / Pops
Given the amount of time involved in the whole process, this step can save us both a lot of time. Listen closely for any unwanted breaths, clicks, or background noise – particularly in vocal tracks. The mastering process has a tendency to bring these blemishes to the surface.
Given that we can’t remove them, it’s best for you to handle this during the mixing stage.
One more thing: Make sure you give your newly bounced file a good listen in headphones, too. Plugin glitches occasionally appear after the track is bounced out. This is often overlooked when people explain how to prepare a song for mastering.
Leave Headroom – Wait. What’s Headroom?
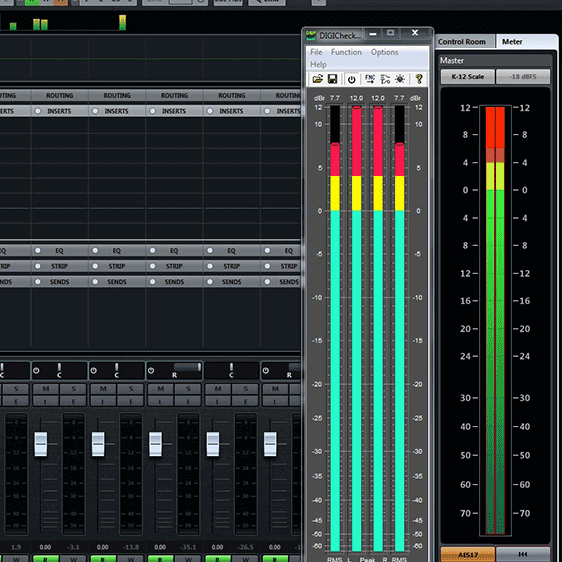
Headroom is the amount of space between the loudest peak of your audio file, and the noise ceiling at 0db.
The “ceiling” is the point where your song file will start clipping in the red if it gets any louder. Essentially, we need you to leave anywhere from -3db to -6db of headroom, so that we have plenty of padding to work with.
You can simply lower the master volume fader to achieve this.
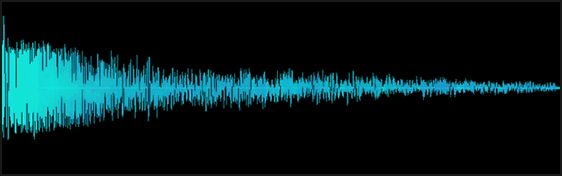
Never Send an Over Compressed WAV File For Mastering
I’m going to let you in on a little secret. Tests have shown that a low quality file played at a louder volume will appear to sound great. Surprisingly, people can actually be tricked into sensing quality. An increase in volume alone is enough to do the job!
Sadly, the “loudness war” has already been won. Natural dynamics were part of the casualties.
With this in mind, recording engineers have been known to give clients a quick “premaster”. They’ll slam the track, and max it out volume wise. This is to give clients that big “in your face” sound, so they’ll be smiling as they walk out the door.
As a result, many artists’ tracks are left in poor shape for professional mastering.
Uncompressed Audio Is Best

Preparing a mix on your own? Here’s the #1 rule when learning how to prepare a song for mastering. Don’t apply any limiting or compression to the master track. Undoubtedly, over compressed files have become an epidemic.
The natural dynamics of the track get squished – lowering the overall quality of your finished product in the process.
Be careful, because sometimes your recording program will include a track slammer or maximizer by default.
Otherwise, you are welcome to use compression on individual instrument and vocal tracks. Just listen carefully for any “pumping” in the sound, and remember – less is more.
Leave All EQ / Effects OFF The Master Track
Similarly, there should be no EQ or global effects on the master bus. This includes EQ, reverbs, transient shapers, inflators…etc. This type of processing is the sparkle – the finishing touches expert mastering engineers will apply on their end.
Why Your Recording Engineer & Your Mastering Engineer Should Be Separate
Since it provides the best results, we recommend having your recording and post production done by separate engineers / studios. Mixing (and specifically mastering) requires a specialist who has fresh perspective, and most of all, fine tuned, unbiased ears.
For example, as an artist, it’s hard to listen to a song you repeated over and over while recording it. For the same reason, it’s difficult for recording engineers. It’s because they are “too close to the music”.
They need to pass it to an objective mastering professional, one who will undoubtedly give it the attention it deserves.

In Summary:
- Use 24 bit WAV or AIFF files (and keep the sampling rate the same as original recording)
- Include 2 to 3 seconds of silence at start and end of tracks, and leave all fades to us
- Listen carefully for any pops, clicks, or unwanted noise
- Leave 3db – 6db headroom (lower volume)
- Do not over compress your song file – limiting is part of the mastering process
- Exclude all EQ and effects from the master track – we want the track as rough and “raw” as possible
- Always take your mix to a separate mastering engineer for best results
Now You Know How To Prepare a Song For Mastering
Given these points, your track should come out very well! Your music will sound larger than life, with the punch and impact you always dreamed of. Speaking of which, there is just one more final step…
Submit Your Song For a Free Mastering Demo
Curious about the difference professional mastering can make? We recommend that you send us a song for a Free Mastering Sample.
That’s it from us, enjoy your master!
– Last Drop Mastering Team